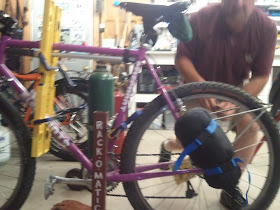
My Elephant was designed to carry a load up front. For daily commuting and grocery getting, it works great. For overnighters, I end up putting a saddle bag on the bike to handle the overflow.
I don't like having weight up high behind my saddle -- it's not awful, but I don't like how it presses against my thighs and I may imagine some slightly degraded handling. Who cares really... because it's always great to have an excuse to build a rack.
A year or so ago Alex and I pondered this issue -- it would be cool to have a place to haul the light but bulky stuff (sleeping pad, tent/hammock, sleeping bag) that takes up so much room in the front handlebar bag.
Alex came up with the idea of a "lasher" rack: a minimalist rack that is low and around the rear axle for bikes that are optimized for front loads.
Pat and I have talked about making one for my Elephant ever since. Pat added some tie downs on his rear rack and really liked the setup on his x-state tour.
By putting the sleeping stuff on the lasher, you only mess with it twice a day, so the slightly fussy strappage deal is minimized and the sleeping stuff isn't always in the way of the stuff that you do need as you pedal through the day.
Pat rallied yesterday and I came over there at 8pm with the goal of brainstorming and maybe getting started. Pat's crazy rack-making-skilz coupled with my "just make it work" approach, allowed us to pretty much get the whole thing tacked out by 10 pm.
 |
| Pat and Glen share a common trait that I lack: they pay a lot of attention to annoyingly small details along every step. Pat even crimps with great care. Measuring, measuring again. Leveling. Fussing. In the end, this fussery that drives me batty and makes me feel like I'm wasting time basically saves a gob of time when everything just works. |
To save some time, we crimped and drilled the ends instead of brazing in forged eyelets. No big whoop there -- the weight requirements for this rack are minimal. We also kept the bends simple: just doing 90 degree bends instead of a fancy arc.
Also, Pat did all the skilled work, basically setting me up for the easy kill: for example, he set up the tube in the bender, and I, well, bent it. I did some sawing. I farted around with the torch for a couple minutes, overheating the wrong part of the tube before Pat gently took over, where upon I applied the brazing rod to mostly the wrong spot.
By the time we fixed up the second stay, I was in charge of holding the stay up as he brazed -- rod and all.
And of course, I fulfilled my obligation to break at least one drill bit per visit.
Eventually, I pretty much was in charge of putting the rack on and off, drinking a beer, and taking some photos.
 |
| Pat brazing by sense of smell with blinder goggles on, "to make it interesting." |
By optimizing thusly according to our skills -- the basic rack came together in record time. As I was leaving, he was preparing to put the lashing hooks on and I was requesting some ad hoc feature additions around light mounting.
I'm thinking he probably finished it last night. Man I'm a lucky dude. Thanks Pat.
I'll be taking it up to the river and giving it a good pounding for the next few weeks. I'll paint it when I get back.


Your over-exaggeration of my skills is as profound as your underestimation of your own. Nonetheless, the yoda-speak thing appeals to me, so I may work on that.
ReplyDeleteThis was the first rack I've built in true, all-out "team" fashion, and I gotta say, it was really fun and interesting. The build time was not only a record, it shattered all previous build times.
And yes, it's finished. I anxiously await the reviews.
ReplyDeleteThis has been a source of inspiration for a rack for me for a while...
A lit torch that close to a tire? Balls, man. That takes balls.
ReplyDelete